You’ve decided to upgrade your GWM TANK 300 with HPR’s CDC Nitrogen shocks—great choice! Now, you’re probably wondering: can I install them myself, or do I need a professional? The good news: HPR designs its shocks for ease of installation, but there are a few key things to know to ensure a smooth process.
First, let’s start with the basics: HPR CDC Nitrogen shocks are engineered as a direct OEM fit for the GWM TANK 300. That means no cutting, drilling, or modifying your vehicle’s suspension—they bolt right into place using your factory mounting points. For most DIYers with basic tools (a socket set, torque wrench, and jack stands), installation can be done in 2-3 hours.
Here’s a quick step-by-step overview:
Safety First: Lift your TANK 300 with a jack and secure it on jack stands—never work under a vehicle supported only by a jack.
Remove Old Shocks: Disconnect the factory shocks from the top and bottom mounts (you may need to remove small brackets or clips).
Prep New Shocks: HPR CDC shocks come pre-charged with nitrogen, so no additional setup is needed—just unpack and inspect for any damage.
Install New Shocks: Align the CDC shocks with the factory mounts and tighten the bolts to the recommended torque (check your TANK 300’s manual or HPR included guide).
Connect Electronics: Plug in the CDC control module (included) to your vehicle’s OBD port—this is how the shocks communicate with your TANK 300’s systems for real-time adjustments.
Test & Calibrate: Lower your vehicle, start the engine, and switch through the four modes to ensure everything works smoothly. Take a short test drive on a quiet road to check for unusual noises or vibrations.
While DIY installation is possible, if you’re not comfortable working on your suspension, a professional mechanic can handle it in under an hour. Either way, you’ll be hitting the trails with your new CDC Nitrogen shocks in no time—ready for smoother rides and better control.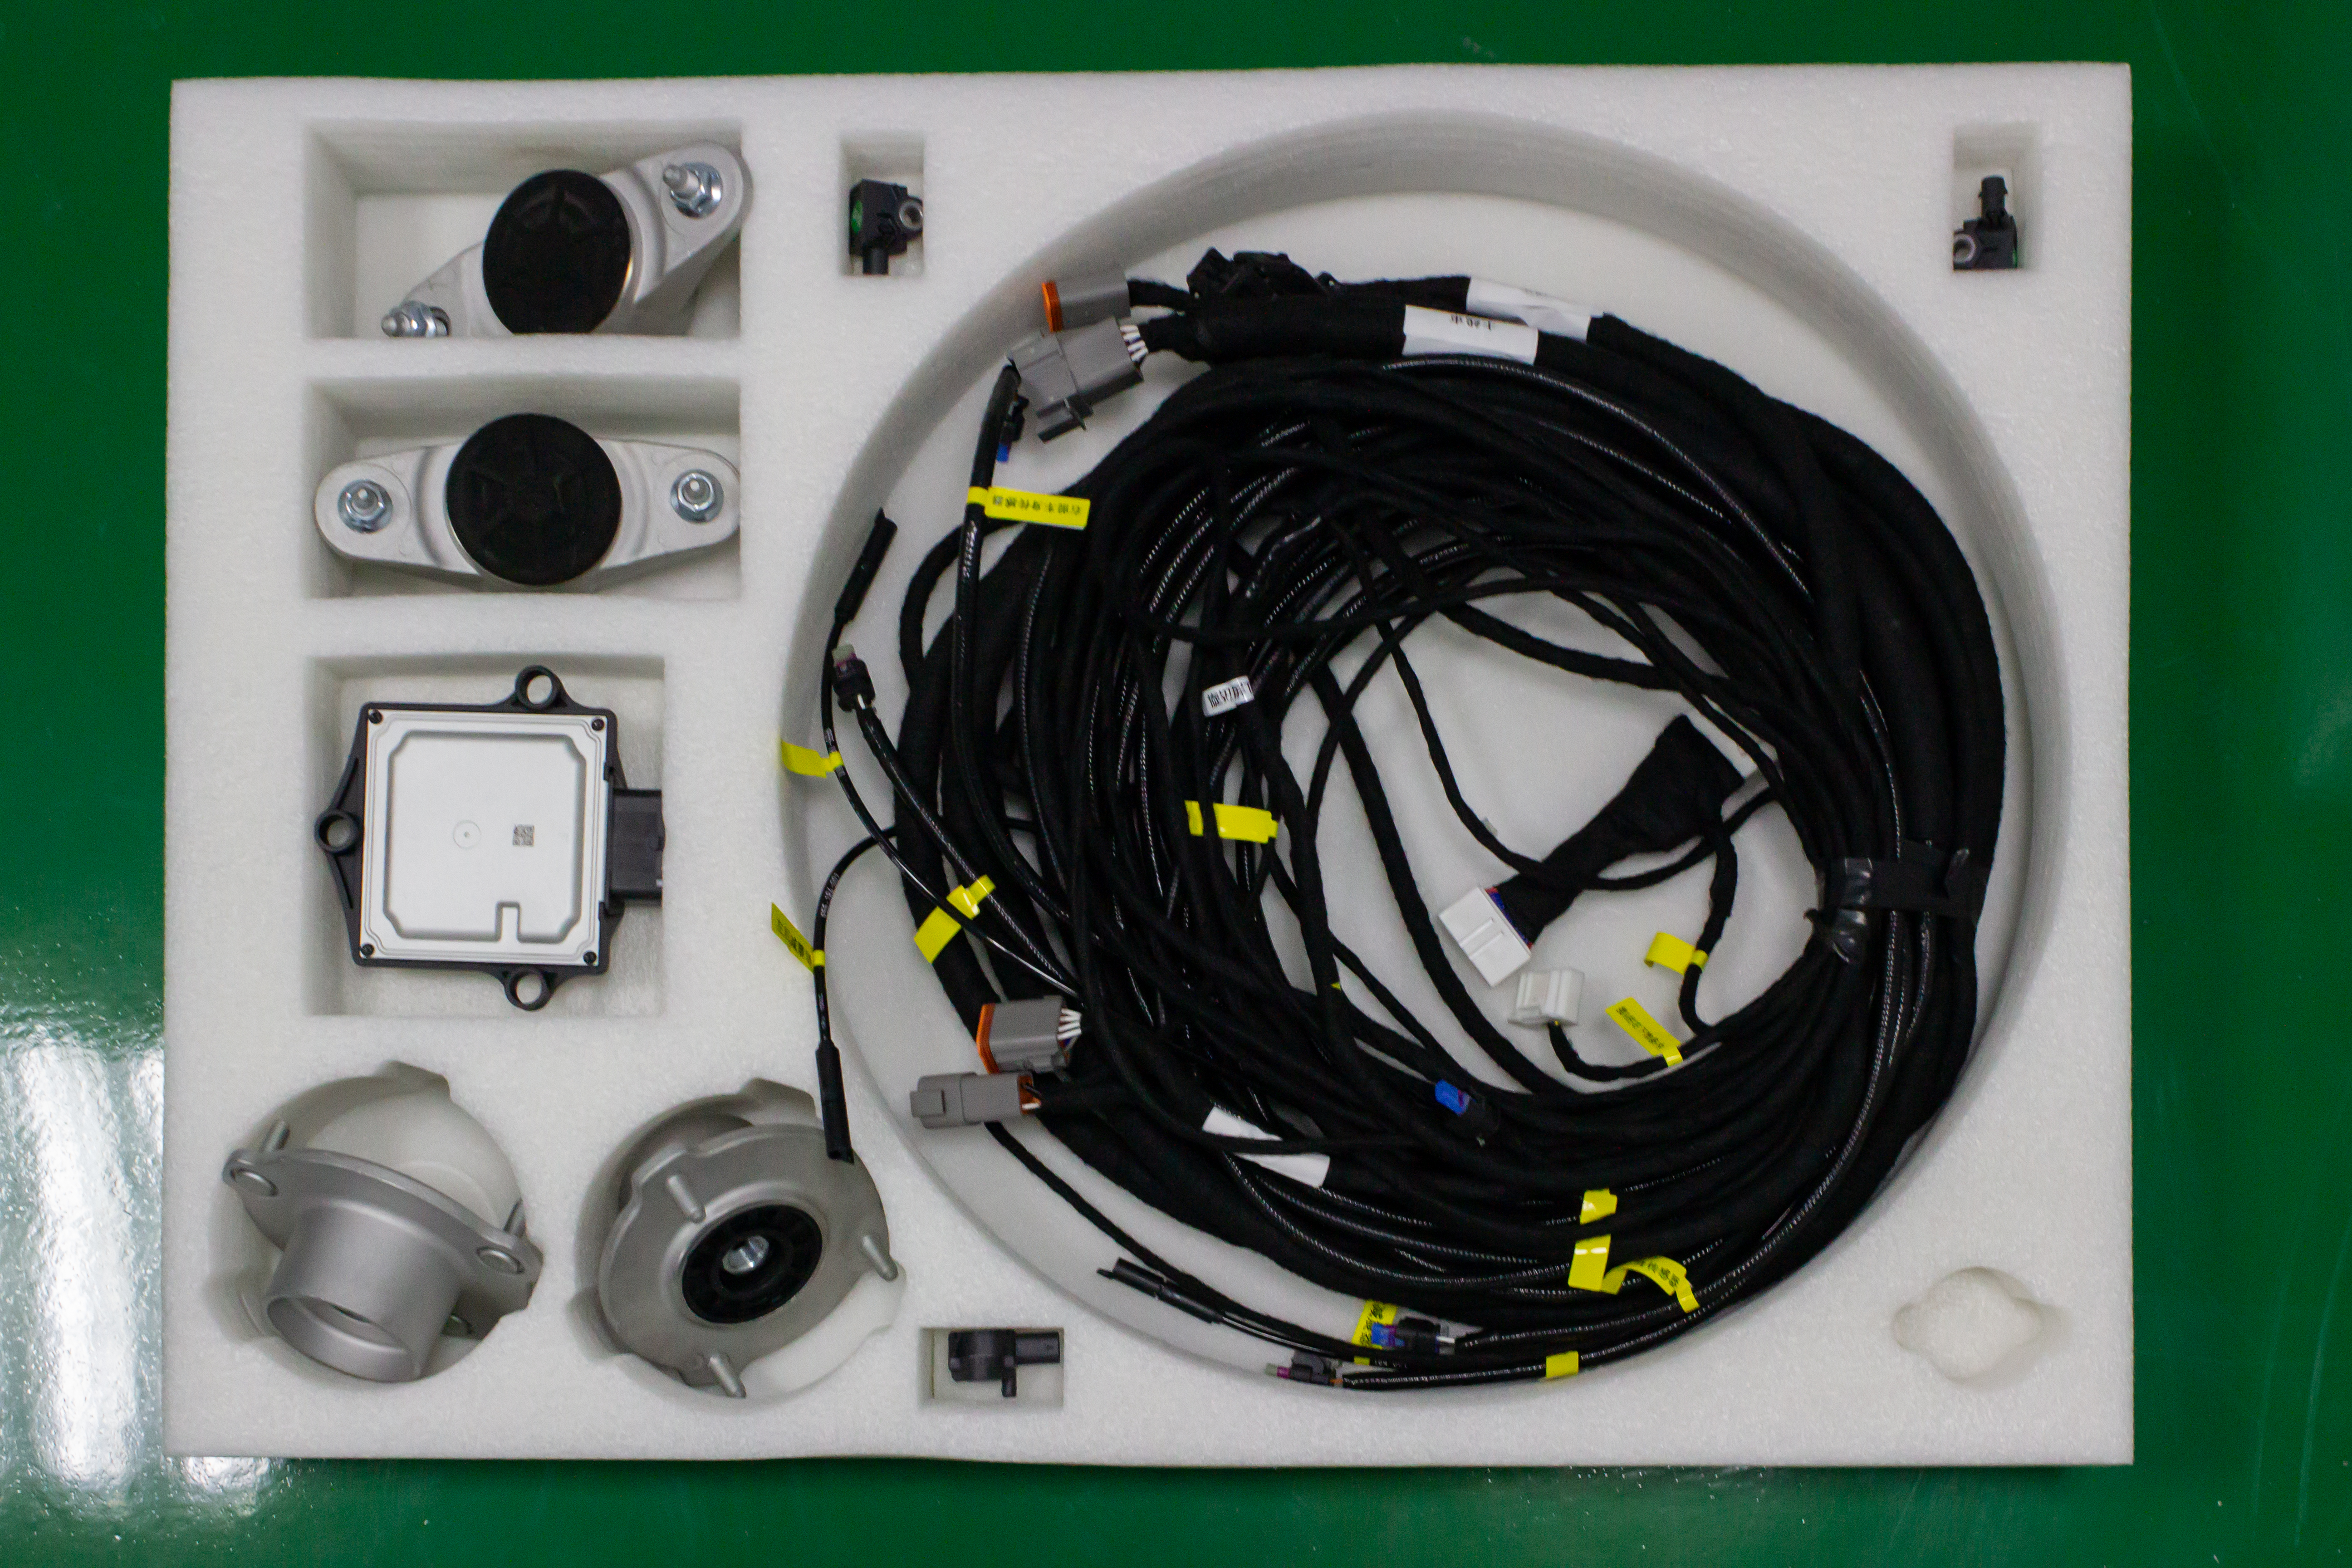
Post time: Jan-08-2026